FIRST FLOOR
Step-by-step assembly
Did you put the ground floor together successfully? It’s time to move on to part 2: the first floor!

step 1
Look for wall parts like shown in the illustration above. Part 1 is the ceiling and wall of the extension. Part 2 has the big opening for the front window and a cut-out that will be connected to part 1. Part 3 contains the back and side wall and part 4 is the floor.

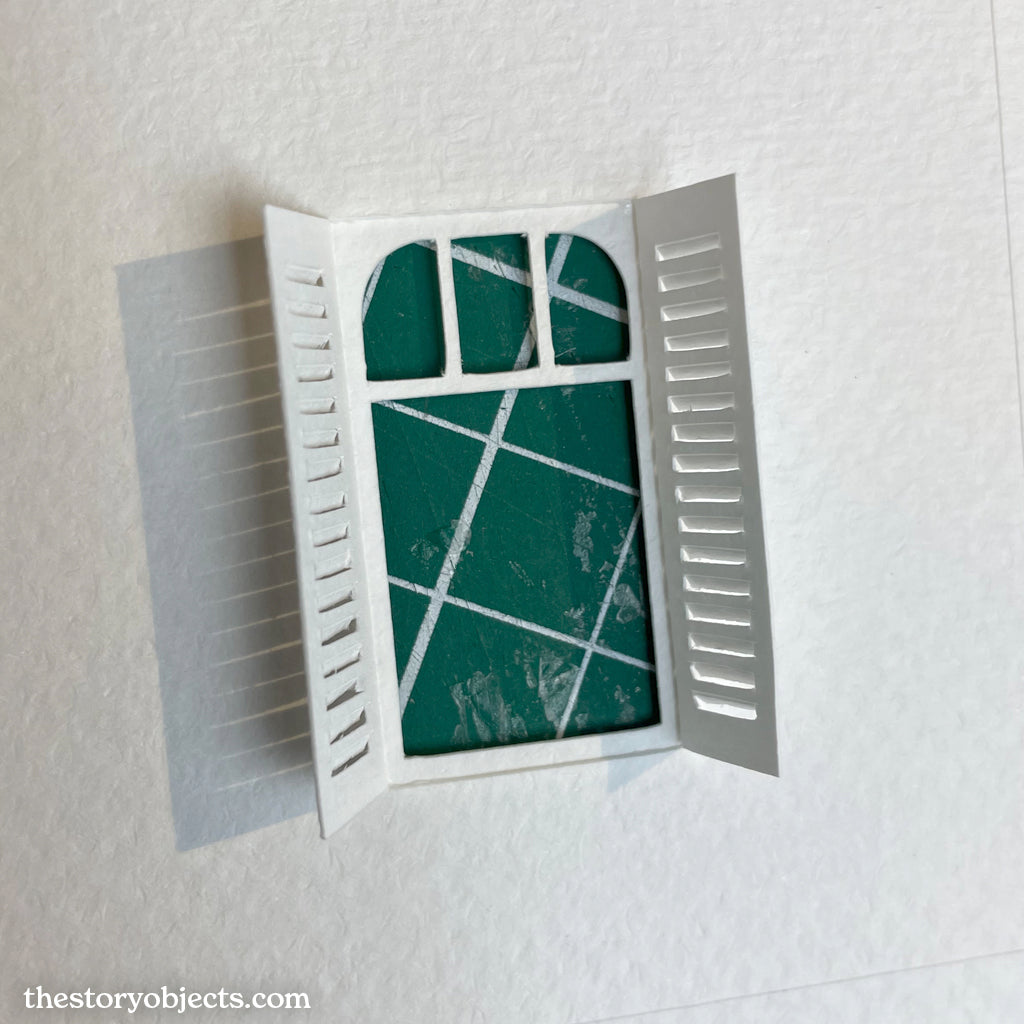
step 2
Start with part 1, score the dashed lines from the back so the shutters can fold outwards.

step 3
If you like you can score all individual slats of the shutters on the backside and use your knife to push them to the front. It's a lot of work but it looks really nice!

step 4
You can also use your knife to make the slats pop-up on the front.

step 5
Find parts A and B. Part A will be glued onto the back of part 1, and part B will be placed around the shutters on the front.

step 6
Add glue to part 1, and put part A in place.
step 7
Flip the paper to see if the piece is properly aligned and do some finetuning if you must while the glue hasn’t dried.

step 8
Attach part B, the window frame, around the shutters.

step 9
Put decorative part C in place. Add glue to part C and position.

step 10
Now the window in the front. Find window part D and wall part 2. Add the glue on the backside of part 2 and attach part D from the back.

step 11
Part E and F together are the window frames that go around the 3 windows on the right side of the first floor, part 3. We’re going to glue part E on top of part F.

step 12
Add the glue to part E and place it on top of part F.

step 13
Add them around the 3 small windows of part 3. Also score dashed lines of the windowsills on the backside to make them stick out to the front.

step 14
Let’s start the construction of the first floor! Find part 1 and add glue to the flaps circled in the picture above.
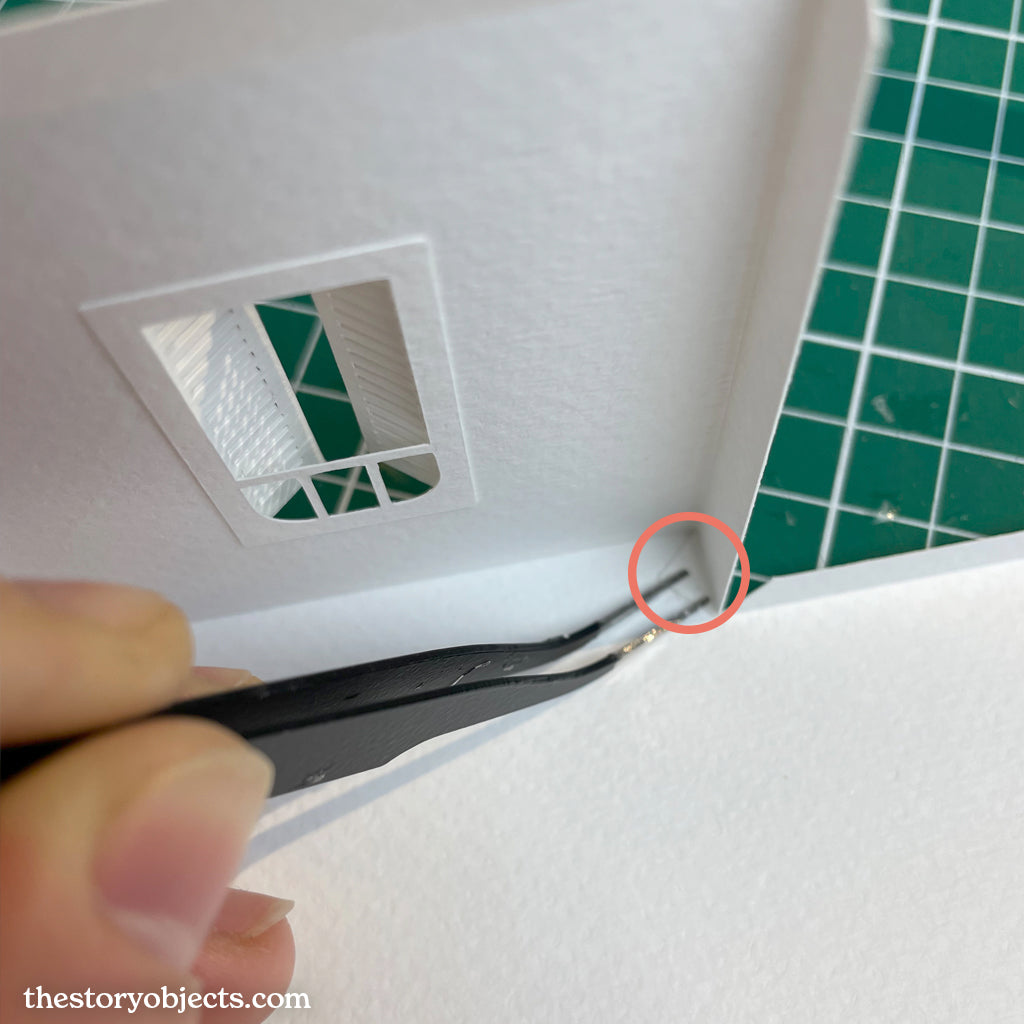
step 15
Flip the model and use your tweezers to press down on the flaps until the glue has dried.

step 16
Repeat this step with the flaps on the opposite site of the extension wall. Use your tweezers to hold the parts together.

step 17
Now find wall part 2, we’re going to attach it to part 1 starting with the flaps marked with an arrow in the picture above.

step 18
Apply glue to the flaps marked with a circle in the picture above.

step 19
From the backside you can use the end of your tweezers to press the flaps in place.

step 20
Now add glue to the flaps marked with a circle in the picture above to finish the extension.

You can use your fingers or tweezers to press the flaps onto the extension.

step 21
Now apply glue to the flap marked with a circle and attach it to part 2.

step 22
Flip the model and add pressure with your finger or tweezers from the inside.

step 23
Now we’re going to attach wall part number 3 to part 1 and 2.

step 24
Add glue to the flaps marked with a circle in the picture above and attach part 3.

step 25
Add glue to the flaps marked with a circle and close off the first floor.

step 26
Now all we need to do is to attach the floor! Add glue to the flap marked with an arrow and attach the floor to this flap first. Then apply glue to the other 3 flaps, close the cube and flip it. Now you can use your tweezers to secure these 3 flaps from the inside of the model. I made a hole in the backside of the model so you can put LED lights inside, but also to make it easier to put together.

step 27
Find piece H, this is the shelter that will go above the big window in the front. The parts marked with an I are the support.

step 28
These tiny flaps on the top of the shelter are good candidates for peeling off one layer of paper. It makes it way easier to glue these parts together.

step 29
Now close off the shelter by glueing the bottom part together.

step 30
Voila! This is what it should look like.

step 31
Put the supports together, parts labeled I. Also these flaps can be ‘peeled’ if you feel comfortable doing so. If not it also works to put them together without slimming them down.

step 32
Attach the shelter, part H to part 2. Align its bottom with the top of the window.

step 33
Add glue to the top and back of the supports.

step 34
Place them onto part 1 and press from the inside of part H down with your tweezers to secure them.

step 35
Let’s add some details! These roof tiles add more texture to the model.

step 36
Now find pieces K and J. Part K is the shortest, it goes on the front, underneath the big window with shelter. The parts labeled J are for the left and right side. Look closely, these two parts are not the same, they are mirrored. One of their sides does not have a 90 degree angle, it’s marked with a circle in the illustration. The side that is circled will face the front of the first floor since this wall is slightly tilted.

To check if you have the right I part, lay it on top of the first floor first to see if the angles of the decorative piece match the angle of the wall.

step 37
Now add these lovely fellahs! They’ll cover the corner.

step 38
Add his sister to the other front corner aaaaand it’s time for a vicotry dance because you just finished the first floor! Now we’re ready to put the ground and first floor together!

step 39
Add a royal amount of glue to the top of the ground floor. Make sure you cover the corners and add glue close to the edges.

step 40
Use a scrap of paper to evenly spread the glue but be quick, so the glue doesn’t dry out before you got your parts together.

step 41
In the front the first floor is sticking out a bit.

step 42
Align the two floors on the back and on the sides.

step 43
Perfectly aligned? Add some books. Here’s a promotion of some lovely books. Look up Tom Gaulds comics on Instagram, they’re really good!

step 44
AAARGH! Always when I think I’m ready I forget just one piece. So… sorry if you thought you were done. We got this windowsill left. Peel off one layer of the looongest flap, apply glue and attach it to the part marked with an arrow.

step 45
Close up the ends and you’re done! Peel a layer off these tiny flaps for the tightest result.

step 46
Attach it underneath the window. And now we’re really done with the first 2 parts!! Hooray!