How to: Paper Street DIY-kit - Assembly part 1/4
GROUND FLOOR
Step-by-step assembly
If you have all the right tools in place, and the parts are all cut, it's time to start assembling! I’ve made this step by step guide with a lot of pictures to guide you through the process in the best way. Please get in touch if things are unclear or if you get stuck.
I’ve divided the model into 4 parts: ground floor, first level, rooftop and archway. All pieces are grouped per part, you can find a label in the top right corner of your print-out or pre-cut sheets. In the SVG file all parts are grouped with a blue border around them. If you cut the SVG files yourself and ended up with pieces that are not grouped, consult the pdf files to sort them out first.
There's 3 different types of lines: cut lines, folding lines and dashed lines for valley folds. If you have the pre-cut kit, the cut and folding lines are already there but the valley folds still need to be scored. We cut those on the backside of the paper.

STEP 1
First find the three biggest pieces on the sheets labeled ground floor. We’ll name them wall part 1, 2 and 3.

STEP 2
With your knife take out the pieces that are still stuck, for example these window parts.

STEP 3
Now let's collect the following parts and start with the shop front. Part A is the shop front, B is the top of the arch of the shop front, C will go behind the door and D is the window sill of the shop window.

STEP 4
Look for the 3 dashed lines as marked in the illustration above, these are valley folds. Score them from the backside of the paper.

Use a metal ruler and gently guide the knife along it cutting halfway through the paper.

STEP 5
Now you can bend the valley fold. It should look like the picture above. Repeat the process for the other 2 lines.

STEP 6
Valley fold the triangles of the arch without scoring them, they’re small enough.

STEP 7
Also make a small halfcut on the backside for the mailbox and door handle and fold them outward so they pop-up to the front.

STEP 8
Find piece D, the windowsill. We’re going to attach it to the shop window from the backside. This way the small strip of paper is facing the front.

STEP 9
Apply the glue to the shop front and put piece D in place.

STEP 10
Now we’re going to attach piece C to the backside of the door. Add glue to the door and position piece C.

STEP 11
When attached it should look like this from the back.

STEP 12
Find piece B, the top part of the arch and bend it slightly, holding the part between two fingers and gently stroking along the paper strip.

STEP 13
Add glue to the top right corner of the shop front aligning the dashed line of piece B with the top part marked by the arrow in the picture above. Squeeze together using tweezers until secured.

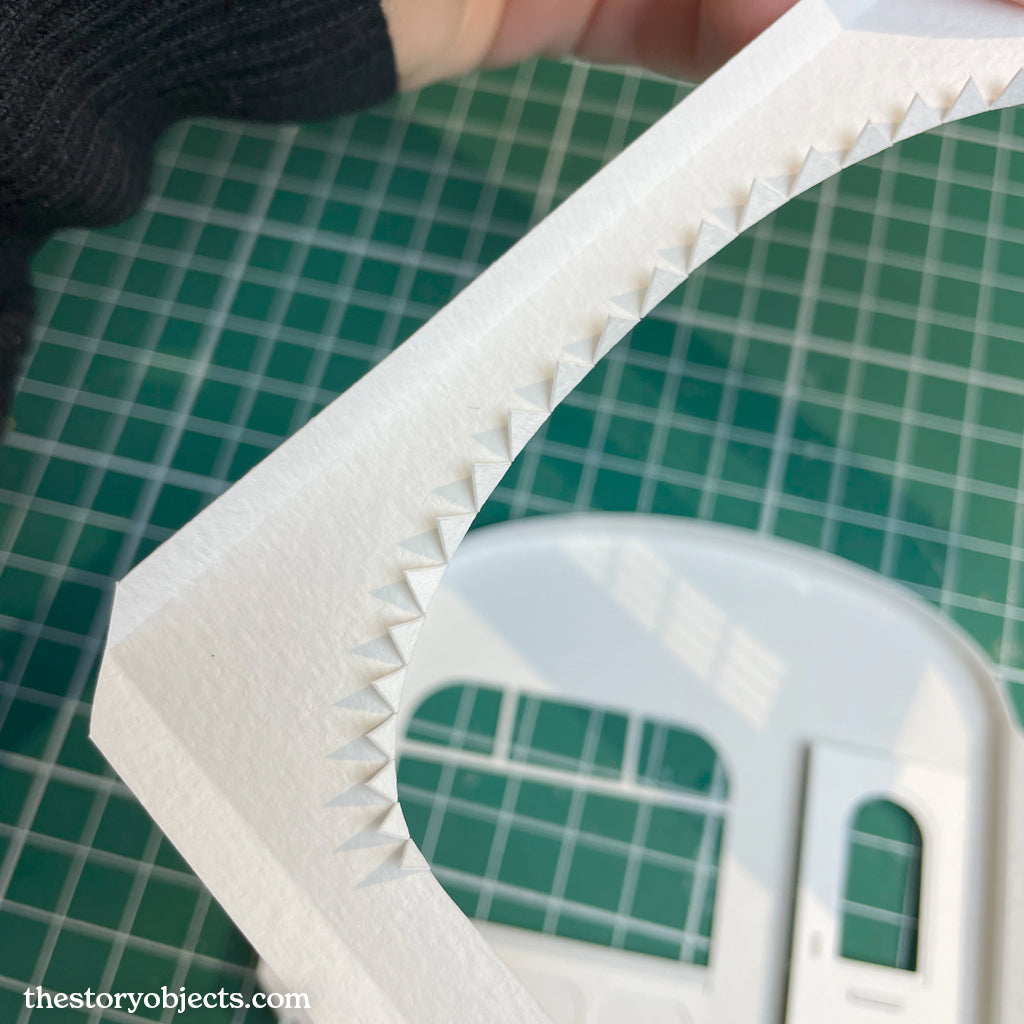
STEP 14
Now add glue to the triangular flaps of the arch. And attach them to the strip using tweezers to hold them together until the glue is dry. Work your way along the arch. Add glue to around 6 flaps at a time so you don’t have to hurry too much before the glue dries.

STEP 16
When you’ve worked your way along the arch, add a bit of glue to the top left corner of the shop window and finish the arch. Again use tweezers to hold parts together until the glue has dried.
STEP 17
Now let’s get part 1 (see picture step 1). Fold the triangular flaps inward as far as possible. We’re going to attach the shop window that we just finished, to this piece.

STEP 18
We’re going to attach part 1 to the flap that’s circled in the picture above.

STEP 19 - OPTIONAL
Pro tip: if you’re confident enough and have the right type of paper you can peel a layer off the paper, making the flap thinner. This way the model fits together more precisely. Don’t sweat it, it’s not a must!

STEP 20
Add a good amount of glue to the flap.

STEP 21
Evenly spread the glue using a toothpick or the tip of your applicator bottle.

STEP 22
Start with aligning the bottom, the corner marked with a circle in the picture above. Use your fingers to properly align and secure the flap to part 1.

STEP 23
Now flip the shop front, lay it face down on the cutting mat and use the back of your tweezers or fingers to press the parts firmly together.

STEP 24
Find the same flap on the opposite site of the shop window. If you like, peel off one layer of paper, apply glue and evenly spread it. Position the parts, precisely aligning the bottom left corner.

STEP 25
Press the parts together firmly with your fingers. Then lay the part face down on the cutting mat again, using the back of your tweezers to press the parts together.
STEP 26
Now apply glue to the triangular flaps and attach them to the arch. Glue around 6 flaps at a time using tweezers to press the pieces together until the glue is dry.

STEP 27
If it looks like this, you did a very good job. If you messed up a bit, don’t worry! I’ve got you covered with the next pieces that will cover the joint line of the arch. This was the hardest part of the model, from now on it will all be a breeze ;). This is a good moment to take a break! You’ve deserved it.

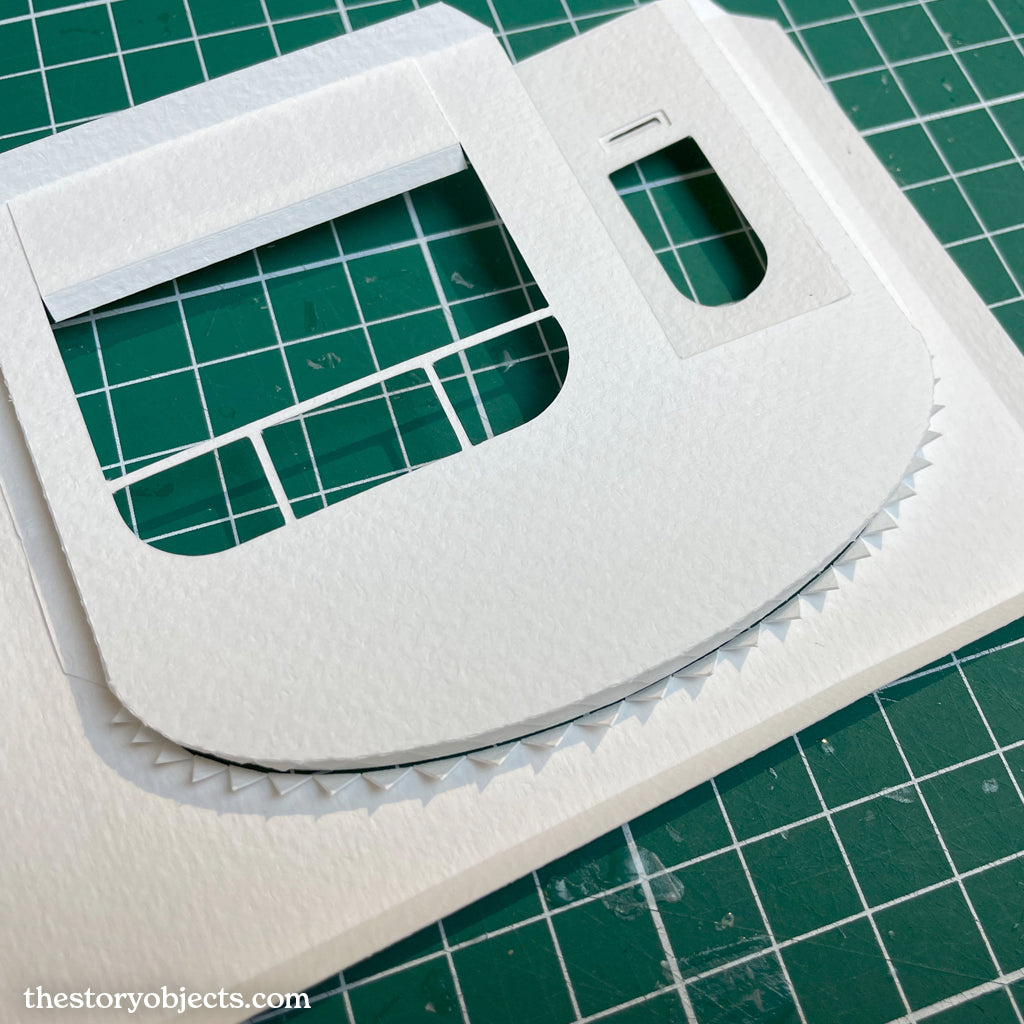
STEP 28
Let’s finish the shop front with these decorative pieces. Piece G is the window frame, H is the door frame. We’ll start with attaching part E to the arch, then part F & parts I (2 mirrored parts) will go on top of E.

STEP 29
Add glue to the decorative pieces, not to the building. Then attach them onto the facade. Take a look at the next picture to see how it should look when put together.

STEP 30
Tadaaaa! It’s really starting to look like something!

STEP 31
Add the window frames on the left side of the ground floor.

STEP 32
Time to put the wall pieces together! Circled are the edges that should be glued together first.

STEP 33
Add glue to the flaps marked with a circle and put the ceiling in place.

STEP 34
Rotate the model 90 degrees so you can now use your finger or the back of the tweezers to add pressure to the flaps.

STEP 35
Add pressure to the flap on the right side and secure the parts together until the glue is dry.

STEP 36
Add glue to the flaps marked with a circle and glue the floor in place. Rotate the model and press the parts together from the inside of the model.

This is what it should like if glued together properly.

STEP 37
Now there’s only one wall left to attach. Add glue to the flaps marked with a circle. Put the wall in place and press the flaps together from the inside like in step 34 & 35.

The ground floor is almost ready! Last detail to add: sunblinds.

STEP 38
Look for the sunblinds and fold them like illustrated above.

STEP 39
Add glue and use tweezers to secure parts together. Optional to peel off a layer of the flaps to make the sunblind fit more tightly.

STEP 40
Add the stripes. Use glue and your fingers or tweezers to hold the stripes in place until the glue is dry.

STEP 41
Add glue to the backside of the blinds.

STEP 42
Place the sunblinds over the window, leaving a small border around the window frame.
 Voila! The ground floor is ready!
I hope you enjoyed building the first part. Let me know how the process went. And please share your project on Instagram tagging @veravanwolferen
Now let's put together the first floor!